In this series, I’m going to work through the process of deploying and maintaining a simple web application. The goal is for you to get an understanding of all the steps that may be involved in deploying a web app and maintaining it in production with modern tools and techniques.
To follow along in this series, it would help to have an understanding of the command line, python programming, and basic web application development. I’ll be using the Flask web development framework. You’re in my target audience if you’ve built simple Flask applications running locally, and you now want to deploy it and use related best practices, such as implementing development, staging, and production environments, using docker containers, and making changes to the application via continuous integration / continuous deployment (CI / CD) tools.
The focus here is not on the web application itself – rather, it’s on the process of deployment and maintenance. I’m going to get into all the nuts and bolts related to getting the app running live and maintaining it in a smart way. Along the way, we’ll learn about the best practices around deploying a web application that I find are not readily available in many tutorials.
Table of contents:
Part 1 – Setting up the server (currently reading)
Part 2 – Setting up the Database and App Configuration
Part 3 – Adding Tests with Pytest
… To come, as I finish the series 🙂
Getting Started
As the basis for our adventure, we’ll start with the simplest Flask app possible: the hello world app from the Flask website.
To get the full code for this application, run:
git clone https://github.com/marknagelberg/app-deploy.git
You need install Conda, which is the tool I use for managing the python environments (see my related post here). The environment information is stored in environment.yml in the repository.
To create the python environment from the environment.yml file, run the following command in the main project directory (i.e. app-deploy/):
conda env create -f environment.yml
The conda environment is called ‘app-deploy’. To run the environment after you’ve created it, simply type (on Mac or Linux):
source activate app-deploy
Or on Windows:
activate app-deploy
For each part of this series, I will provide a git checkout command that will allow you to see the code in the state relevant to that part of the series.
To start off with the initial, most basic version of the application, run:
git checkout 75521eb0e3
The main document in the repository is a file called app.py that looks like this:
https://gist.github.com/marknagelberg/cb0084c0e4720a8dbc6d36b544909759
First activate the environment, which will add ‘(app-deploy)’ to your command line to indicate you are in the environment, like this:
![]()
Now that you are in the appropriate python environment, you can run:
python app.py
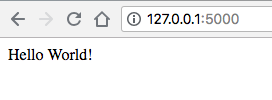
Which runs Flask’s development server and serves the app to http://127.0.0.1:5000/.
If you visit the site in the browser, you should see this:
Part 1 – Setting up the Server
As a first step in this process, we’re going to spin up a server that will ultimately run the web application in production.
An aside for data scientists: Running and configuring web servers is a valuable skill for data scientists. You often need to do this to run data-driven applications you build for others (you don’t want to be running these things on your desktop computer). Furthermore, there are many valuable tools and services out there for data scientists and their coworkers that are designed to run on a server, rather than as a desktop application (e.g. Apache Superset, which is a free and open source business intelligence dashboard like Tableau or PowerBI). Servers also come in handy for your own personal use even if you have no plans to deploy a web application. For example, your server can run scripts that automatically create reports and send you email notifications, or you can run web scrapers that collect data while you sleep.
Back in the day, you needed an on-site physical server to do this. Thankfully, modern cloud computing makes it incredibly easy and cheap to run your own server. There are a few good options out there, but in this series, I’m going to use a Digital Ocean “droplet”.
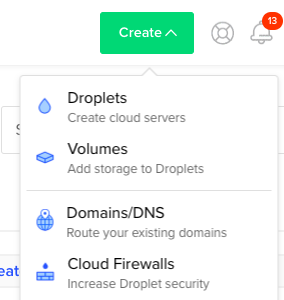
First, create an account with Digital Ocean. Then, choose the option to create a droplet:
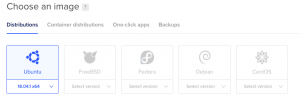
Then, choose the operating system that you want your server to run on. I went with Ubuntu, since it’s what I’m most familiar with. It has a large user base, and as a result, there is lots of online tutorials / documentation to help you troubleshoot when things go wrong.
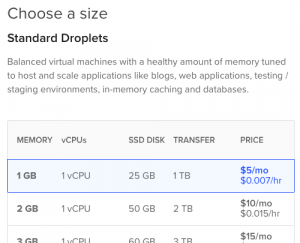
Then choose the memory and CPU power of your server. I went with the smallest / cheapest one. It’s easy to “resize” your droplet later on if you realize you need more juice.
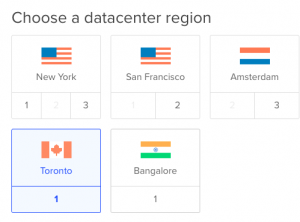
Now choose a datacenter region – this is the location where your server will run. I suggest picking a data center closest to you, or closest to where your users will be. For me, that’s their Toronto data center.
Finally, you have to specify an SSH key. This will allow you to use the ssh command line program to log into your server remotely (you’ll be working with your server entirely through the command line). DigitalOcean gives you the option to enter it right inside their online dashboard interface as a step in creating the droplet. They also provide this useful guide. Here’s what I did on my Mac.
- Run the command:
ssh-keygen
This generates two files which represent the public-private key pairs that you’ll need to authenticate via SSH. Save these files in your ~/.ssh directory (this is the directory where the ssh program will automatically look when you attempt to log into the server). You’ll also get an option to add a password to the file, which is recommended as protection against your laptop being stolen and someone getting access to the files.
id_rsa and id_rsa.pub are the default names for these public / private key pairs. Since these already exist in my .ssh directory, I chose a different filename: app-deploy and app-deploy.pub.
Once you create these files, you then need to copy the contents of the public key (i.e. the file ending in ‘.pub’) into the “New SSH Key” form that Digital Ocean provides when setting up your droplet:
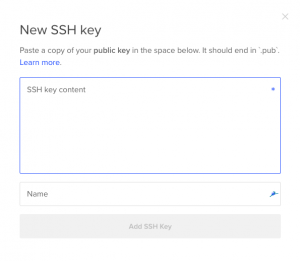
After entering in your public key, you can click the button to create your server.
Finally, to login to my server I run:
ssh -i ~/.ssh/app_deploy root@server_ip_address
If you chose the default filename (id_rsa and id_rsa.pub), then you only need to run:
ssh root@server_ip_address
And congratulations – you are now logged into your own personal server running in the cloud!
For access to my shared Anki deck and Roam Research notes knowledge base as well as regular updates on tips and ideas about spaced repetition and improving your learning productivity, join "Download Mark's Brain".
One thought on “Workflow to Deploy and Maintain a Web App”